Quantcast
Channel: WaveEngine Team
Viewing all 54 articles
Browse latest View live

New Model asset workflow

$
0
0

In WaveEngine 2.5.0, the model pipeline has been improved, and as a result, there are a lot of new features that makes easier to work with model assets:

  • glTF support. Now you can use glTF models in addition to FBX, DAE, OBJ, etc.
  • New Animation pipeline. A redesigned Animation3D component with blend animation trees.
  • Skinning & Morphing. Deform meshes using bones or morph targets.

glTF support

In WaveEngine 2.5.0 we have included glTF to the list of supported 3D model file formats. glTF (GL Transmission Format) is a file format for 3D scenes and models using the JSON standard. This format is beginning to gain momentum, and It’s being widely adopted by the community.

To use a glTF model in WaveEngine, yo only need to drop the glTF folder (that contains .gltf file and binary files and texture resources) to your Asset folder in WaveEditor, or just add the .glb file (glTF binary file).

New Animation workflow

We have reimplemented the Animation3D component, which contains the following properties:

  • ModelPath. Set the asset model that contains the animations.
  • CurrentAnimation. The animation that is currently played.
  • PlaybackRate. The speed of the animation that is being played.
  • PlayAutomatically. It indicates if the animation will be played automatically without the need to invoke the Play() method.

When you instantiate a model in your scene, an Animation3D component is added automatically if the model has at least one animation track.

Model hierarchy

Starting in WaveEngine 2.4.0, the model node hierarchy is mapped into an equivalent Entity hierarchy. And now, when an animation is being played, Animation3D changes the properties for entities in its hierarchy.

These are the properties that can be modified by animation tracks:

  • Transform3D.LocalPosition.
  • Transform3D.LocalOrientation.
  • Transform3D.LocalScale.
  • SkinnedMeshRenderer.MorphTargetWeights. Allows the animation of Morph Targets (we’ll explain this in next sections).

Animation blend trees

A common task in a graphic application is to blend between two or more similar animations. A good example is the blend between walk and run cycle in a character. Now, in the Animation3D component, when you want to play an animation, you can specify a blend tree.

A blend tree is composed by Animation Blend Clips. In this version we provide the following blend clips:

  • The simplest blend clip. It reproduces the specified animation track.
  • Allow a transition between two clips at a given time.
  • With this blend clip you can interpolate between two animations with a specified factor. For example, if you have a run and a walk animation cycles, you can mix (50% walk and 50% run for example).
  • You can add a clip to another clip. This is useful for example to add “filters” to an animated characer. For example, to your walk-run cycle, you can add animations for aiming, instead of having separate animations for aim-run and aim-walk.

New Skinning system

We have improved the Skinning meshes. In WaveEngine 2.5.0 all skeleton bones are mapped directly in the entity hierarchy of the model. This add more possibilities in that area. For example, to attach a weapon to a character hand you only need to add the weapon model as a child of the hand’s bone entity.

Morph Targets

In a morph target animation, a “deformed” version of a mesh is stored as a series of vertex positions. In each key frame of an animation, the vertices are then interpolated between these stored positions.

In WaveEngine 2.5.0, you an add morph target animations to your 3D model.

Removed previously deprecated components

In WaveEngine 2.4.0, we deprecated several components, and in this version, we have finally removed them. This is the removed component list:

  • Model
  • ModelRenderer
  • MaterialsMap
  • SkinnedModel
  • SkinnedModelRenderer

WaveEngine 2.4.1 to 2.5.0

$
0
0

This article is a brief guide to solving the majority of problems that you will find when you upgrade your game project from WaveEngine 2.4.1 version to 2.5.0.

Although WaveEngine has an upgrade tool that runs when you open an old game project with the current WaveEditor 2.5, you can find some issues listed below.

An important point to bear in mind is that Model, ModelRenderer and MaterialsMap components are not longer supported, so you should replace them to use FileMesh, MeshRenderer and MaterialComponent respectively. For more details, you can read the following article. We allowed them to be used in the previous version as deprecated classes.

So, here we go!

Loading Game Info

The most important change is that we need to Load the GameInfo file (.wgame).

WaveEngine 2.4.1

// In the Game.cs file
public override void Initialize(IApplication application)
{
    base.Initialize(application);
    
    // The rest of the Initialize code
}

WaveEngine 2.5.0

// In the Game.cs file
public override void Initialize(IApplication application)
{
    base.Initialize(application);

    this.Load(WaveContent.GameInfo);
    
    // The rest of the Initialize code
}

RenderLayers

Main difference is LayerType properties has changed to LayerId, holding now an int identifier instead of a Type.

WaveEngine 2.4.1

material.LayerType = DefaultLayers.Opaque;

WaveEngine 2.5.0

material.LayerId = WaveContent.RenderLayers.Opaque;

WaveEngine 2.4.1

// drawable2D can be a SpriteRenderer, SpriteAtlasRenderer, TextRenderer2D, etc.
drawable2D.LayerType = DefaultLayers.Alpha;

WaveEngine 2.5.0

// drawable2D can be a SpriteRenderer, SpriteAtlasRenderer, TextRenderer2D, etc.
drawable2D.LayerId = WaveContent.RenderLayers.Alpha;

Mainly every property Type LayerType has been changed to int LayerId.

Sampler State

The AddressMode has now evolved to the SamplerState, and can be configured in the Texture Asset, instead of the material or the component.

StandardMaterial

WaveEngine 2.4.1

standardMaterial.Diffuse = diffuseTexture;

WaveEngine 2.5.0

standardMaterial.Diffuse1 = diffuseTexture;

WaveEngine 2.4.1

standardMaterial.DiffusePath = WaveContent.Assets.Textures.Texture1_png;

WaveEngine 2.5.0

standardMaterial.Diffuse1Path = WaveContent.Assets.Textures.Texture1_png

WaveEngine 2.4.1

standardMaterial.TexcoordOffset = Vector2.Zero;

WaveEngine 2.5.0

standardMaterial.TexcoordOffset1 = Vector2.Zero;

WaveEngine 2.4.1

standardMaterial.Ambient = cubemapTexture;

WaveEngine 2.5.0

standardMaterial.ENVTexture = WaveContent.Assets.Environment_cubemap;

WaveEngine 2.4.1

standardMaterial.AmbientPath = WaveContent.Assets.Environment_cubemap;

WaveEngine 2.5.0

standardMaterial.EnvironmentPath = WaveContent.Assets.Environment_cubemap;

Dual Material

The DualMaterial class has been removed. It has been merged into the StandardMaterial, which now has Diffuse1 and Diffuse2 properties, among others.

Mixed Reality with Wave Engine

$
0
0

In this tutorial, we will cover the creation of your first Mixed reality app using Wave EngineWe will find out why using this engine is a good choice for creating your holographic experience.

In this app we will load a plane in front of the viewer.

Prerequisites

For simulating your app you will need a Windows 10 PC configured with the following tools:

Project assets

  • Download the files required by the project here.

1 – Create a New Project

To create your Mixed reality app with Wave Engine you have to create a new project.

  1. Start Wave Engine Visual Editor
  2. Select File > New Project… (A dialog will appear)
  3. Enter a project name (e.g. “MixedRealityGame”)
  4. Enter the location to save your project.
  5. Select OK.

A new project will be created.

2 – Setup your app for Mixed reality

Now we will setup the project for Mixed reality creating a UWP profile project.

  1. Select Edit > Project Properties…
  2. Click on the ‘+’ button. A profile dialog will appear
  3. Select UWP in Platform.
  4. Enter a profile name (e.g. “MixedRealityProfile“)
  5. Select MixedReality in LauncherType.

This will create a new Wave Engine profile and a new Visual Studio solution.

3 – Setup the MixedReality Camera

To create the camera for Mixed Reality we just have to create an empty entity with the VRCameraRig and the MixedRealityProvider components.

First of all, we will clear the scene removing the default entities of Wave Engine template.

  1. In the Entities Hierarchy panel, select all the existing entities.
  2. Remove them pressing Ctrl+Delete.
  3. Select Create > Empty Entity 3D 
  4. In Entity Hierarchy select ’empty’ entity.
  5. In Entity Details set the name to camera.

Now we will add the VRCameraRig component. This will create a hierarchy of entities under the root entity.

  1. In the top-left area of Entity Details, select the ‘+’ button. The Add Component dialog will appear.
  2. Enter VRCameraRig in the filter textbox.
  3. Select VRCameraRig in the component list.

Now we will add the MixedRealityProvider component exactly in the same way.

  1. In the top-left area of Entity Details, select the ‘+’ button. The Add Component dialog will appear.
  2. Enter MixedRealityProvider in the filter textbox and select it from the the component list.

4 – Create a plane Hologram

Holograms in WaveEngine are just normal entities, so creating them is really easy: All you have to do is place your entities in your scene. One meter in the real world is approximately one unit in WaveEngine world.

In this scene, we will create a plane in front of the user. First, we will import the assets.

  1. In the Asset Details panel, select Asset folder.
  2. Open the folder of the project asset previously downloaded.
  3. Drag the files (a380.fbx, AirbusLightingMap.png and ColorPalette.png) to the Asset Details.
  4. Wait until the assets appear in the Asset Details.

Now we will create a new Entity.

  1. Drag the a380 model asset to the Scene area.
  2. Select the ‘model’ entity in the Entity Hierarchy panel.
  3. In the Entity Details, change its name (e.g. ‘plane’).
  4. Find the Transform3D component, and change LocalPosition to (X: 0, Y: 0, Z: -2). This will place the new entity 2 meters in front of the user’s starting position.

To apply a new material to the new plane entity:

  1. Select Assets > Create Material. A new Material Editor dialog will appear.
  2. Select that DualMaterial in the Shader combo.
  3. Select Diffuse1Path. A Floating panel will appear with the textures of your project.
  4. Select ‘ColorPalette.png’ texture.
  5. Select Diffuse2Path. 
  6. Select  AirbusLightingMap.png‘ texture.
  7. Uncheck LightingEnabled checkbox.
  8. Select Create. The Material Editor dialog will close and a new ‘MyMaterial’ material asset will appear in AssetDetails.
  9. Rename ‘MyMaterial’ (e.g. ‘PlaneMat’).
  10. Drag ‘PlaneMat’ to the ‘mainPlane’ entity in the scene.

Now you can see the final plane hologram fully textured.

5 – Add placing behavior

In Wave Engine we can create our own entity components to extend and customize its appearance or behavior. For this app, we will create a behavior that will place the entity in front of the camera when the user is making the select gesture with his hand.

We will add these behaviors in the Visual Studio solution. First of all we have to add the WaveEngine.MixedReality reference to the Windows Solution.

  1. Select File > Open C# Solution. Visual Studio will be launched with the default Windows Solution.
  2. Select MixedRealityGame project.
  3. In Visual Studio, select Project > Manage Nuget Packages…
  4. Select Browse.
  5. Search for ‘WaveEngine.MixedReality’
  6. Select WaveEngine.MixedReality package.
  7. Select Install.
  8. Select OK.

Now we creates the new behavior

  1. In the Solution Explorer, select MixedRealityGameSource shared project.
  2. Select Project > New Item…
  3. Select Visual Studio C# in the left panel and Class in the item list.
  4. Name it as PlaceBehavior.cs.
  5. Select Add.

We need to edit the GestureManager.cs file to perform these steps.

  • Access the SpatialInputManager and MixedRealityService services.
  • Detect when the user is selecting every frame.
  • In that case, place the entity in front of the user at a certain distance.

You are welcome to write your entity behavior following these guidelines (part1 and part2) , or you can replace the file contents with the following code block:

using System;
using System.Collections.Generic;
using System.Runtime.Serialization;
using System.Text;
using WaveEngine.Common.Math;
using WaveEngine.Components.VR;
using WaveEngine.Framework;
using WaveEngine.Framework.Graphics;
using WaveEngine.Framework.Services;
using WaveEngine.MixedReality;
using WaveEngine.MixedReality.Interaction;

namespace MixedRealityGame
{
[DataContract]
public class PlaceBehavior : Behavior
{
[RequiredComponent]
public Transform3D transform;

private SpatialState lastState;
 
private MixedRealityService mixedRealityService;
private SpatialInputService spatialInputManager;

[DataMember]
public float PlaceDistance { get; set; }

protected override void DefaultValues()
{
base.DefaultValues();

this.PlaceDistance = 1;
}

protected override void Initialize()
{
base.Initialize();

this.mixedRealityService = WaveServices.GetService<MixedRealityService>();
this.spatialInputManager = WaveServices.GetService<SpatialInputService>();

this.PlaceEntity();
}

protected override void Update(TimeSpan gameTime)
{
var gesture = this.spatialInputManager.SpatialState;
 
if (gesture.IsSelected && !lastState.IsSelected)
{
this.PlaceEntity();
}

this.mixedRealityService.SetStabilizationPlane(transform.Position);

lastState = gesture;
}

private void PlaceEntity()
{
Camera3D camera = this.RenderManager.ActiveCamera3D;
if (camera != null)
{
transform.LocalPosition = camera.Transform.Position + (camera.Transform.WorldTransform.Forward * this.PlaceDistance);
}
}
}
}

Now let’s assign the new behavior to the mainPlane entity:

  1. Go back to the Wave Visual Editor.
  2. A prompt will appear asking permission to reload the project. Click Yes.
  3. Wait until the reload is completed.
  4. On Entities Hierarchy, select ‘mainPlane’ entity.
  5. On the top left area of Entity Details, select the ‘+’ button. The Add Component Dialog will appear.
  6. Write PlaceBehavior in the Filter textbox.
  7. Select PlaceBehavior in the component list.
  8. Select Ok.
  9. Find the PlaceBehavior component, and set the PlaceDistance property to 2.

6 – Build and Deploy

The WaveEngine project should have created two Visual Studio solutions for both of our app profiles: Windows (default) and Mixed Reality.

  1. In the project root folder, select ‘MixedRealityGame_MixedReality.sln’ (The solution name will vary depending on the project and profile names). Visual Studio will be launched with our Mixed Reality solution.

The instructions differ for deploying our game in a physical HoloLens versus the emulator. Follow the instructions that match your setup.

HoloLens over Wi-Fi

  1. Click on the Arrow next to the LocalMachine button, and change the deployment target to Remote Machine.
  2. Enter the IP address of your HoloLens device and change Authentication Mode to Universal (Unencrypted Protocol).
  3. Select Debug > Start. If this is the first time deploying to your device, you will need to pair it with Visual Studio.

HoloLens over USB

  1. Click on the Arrow next to the LocalMachine button, and change the deployment target to Device.
  2. Select Debug > Start.

Emulator

  1. Click on the Arrow next to the LocalMachine button, and change the deployment target to HoloLens Emulator.
  2. Select Debug > Start.

Debug and Release

If you want to deploy the app in Release,  you need to adjust the target:

  1. Using the toolbar in Visual Studio, change the target from Debug to Release.
  2. Use Debug > Start without debugging for deploying, instead of Debug > Start.

Try your app

Now that your app is deployed, try moving all around your room, and observe the plane and how it moves when you make the select gesture with your hand.

Events – February 2019

$
0
0

FronFest’19

February 9, Madrid

This year we will be sponsoring FrontFest, a specialized conference for the frontend community that will take place in Madrid. Our colleague Ismael Navarro Páez will also be speaking at the event!

Check out the agenda and buy your ticket here https://frontfest.es


Frontend Developer Love

February 13, 14 and 15, Amsterdam

We will be sponsoring the Amsterdam event organized by Frontend Developer Meetups, where the main experts in Frontend technologies from all over Europe will meet for 3 days of talks and workshops. Our colleague Quique Fernandez, Software Development Engineer in Plain Concepts, will be a speaker.

Everything you need to know about the event can be found here: https://www.frontenddeveloperlove.com


Workshop Identity Server 3rd edition

February 18, 19, 20 and 21, Barcelona

The third edition of the Identity Server Workshop will take place in February, hosted by our MVPs Unai and Luru. But this time, we will change the city and it will take place in our Barcelona offices.

We have 10 tickets for sale, the price is €700 VAT included.

If you are interested in attending you can book your ticket through this link.

And the workshop agenda can be seen from this link.

WaveEngine 3.0 preview

$
0
0

Today we release the first preview of Wave Engine 3.0. This version is the result of more than a year of research and development and with a big effort invested in reinventing this technology. Here’s a summary of what Wave Engine 3.0 means.

In recent years, technologies related to the generation of computer graphics have evolved very quickly. New graphical APIs have appeared such as Microsoft’s DirectX 12, Khronos Group’s Vulkan or Apple’s Metal of Apple which have each offered radical changes on the previous technologies DirectX 10/11 and OpenGL providing greater control of the driver by developers in order to obtain solutions with a performance never seen until now.

More than a year ago these new APIs were analyzed by the Wave Engine team so that the engine could support them. At that time, versions of Wave Engine 2.x were already published with great results within the industrial sector, but this version used a Low-Level layer that worked as an abstraction layer on the DirectX 10/11 and OpenGL/ES graphics APIs.

However, the changes posed by these new graphical APIs (DirectX 12, Vulkan and Metal) were so important that they needed a more profound effort than simply adding additional functionalities to the Low-Level layer to support new graphical functions as in previous versions.

The changes went further, they practically meant a change of “the rules of the game” so after multiple investigations and following the technical recommendations of NVidia it was determined that it was not possible to adapt the old Low-Level layer with support for DirectX 10/11 and OpenGL/ES to the new APIs. The best solution to get the most out of the latest and upcoming graphics hardware was to develop a completely new layer on the fundamentals of DirectX 12, Vulkan and Metal and then adapt and simulate certain concepts on DirectX 10/11 and OpenGL/ES to achieve backward compatibility on older devices.

None of the DirectX 12, Vulkan and Metal APIs are completely equal but they do present several important similarities with the intention of minimizing communication between CPU and GPU, concepts such as GraphicsPipeline, ComputePipeline, ResourceLayout, ResourceSet, RenderPass, CommandBuffer or CommandQueue should be supported by the new layer Low-Level Wave Engine.

Wave Engine 3.0 was born from the beginning because of the need to support these new graphical APIs and to be lighter and more efficient than its previous versions thanks to advances in Microsoft’s .NET technology, such as the NETStandard libraries and the new runtime called NETCore.

So, we started building Wave Engine 3.0 from the bottom up so that we could implement important changes so all libraries should now be NetStandard 2.0 to support NetCore on multiple platforms. This change has meant an in-depth revision of each Wave Engine library where performance has also become one of the most important goals, so from the beginning, many tests were made to compare the performance achieved. Then you can go deeper into these results, but in this image, we can see the performance improvement over Wave Engine 2.5 (last stable) vs Wave Engine 3.0 using DirectX11 in both:

After a lot of work this is the new architecture of Wave Engine 3.0:

In this diagram, you can see all the technologies used by Wave Engine 3.0 to provide the greatest flexibility and adaptability to any type of industrial project.

To explain it we can divide it vertically into 4 sections that starting from the lower part would be:

Now Wave Engine can draw on DirectX12/11, OpenGL/ES, Vulkan, Metal and WebGL. This means greater versatility that allows us to get the best performance possible in each of the platforms and architectures on the market.

The default runtime is .NetCore 3.0 in Windows, Linux, and MacOS although it can also be compiled natively to a destination platform using AOT. This is also the only option on platforms such as iOS and Android using Xamarin’s AOT and the only option on the Web where the AOT Mono-Wasm is used.

At this level, we would have the low-level layer of Wave Engine that connects to the platform, not only at the level of graphics but also for sound, access to files, device sensors, and inputs. On top of this would be the Wave Engine framework, components, and extensions all distributed as Nugets packages.

One of the important factors within the industrial sector is not only to be able to create new applications using Wave Engine 3.0 but also to be able to integrate viewers into existing systems and applications. For this, the window generation layer has been designed in a versatile way to support integrations in applications developed in a multitude of technologies across multiple platforms such as WPF, WindowsForms, UWP, SDL, UI Kit, Android UI and HTML/JavaScript on the Web.

These are all the new pillars of Wave Engine 3.0, but the novelties do not end here. The team is working on improving each and every one of the elements that make up the graphics engine using the latest tools available. We will review these advances below:

Major Features:

New launcher and update system

WaveEngine 3.0 comes with a launcher app separate from the editor which allow you to create new projects, open existing ones, update the WaveEngine NuGet version or even manage and download different Engine versions. These versions are installed on your machine in different folders so that you can work on different projects and use a different version of the engine for each of them.

When a new engine version is available, the launcher will automatically tell you that there is a new version and will let you download it, as well as update any existing projects that you are working on to the latest version.

The launcher app has been integrated into the Windows OS taskbar so that users can quickly open recent projects without having to run the launcher.

New WaveEditor

The new editor has been completely rewritten to increase the functionality to levels never seen before in Wave Engine. The new editor is faster, more efficient, easier to use and more powerful in all aspects.

Why a new editor? The Wave Engine 2.x editor was developed using GTKSharp 2.42, a multiplatform technology that allowed us to create interfaces in Windows, Linux, and MacOS. GTK was still evolving, but Xamarin’s C# wrapper (GTKSharp) wasn’t, and this started to cause us some problems with modern operating system features like DPI management or x64 support. Then we raised the option of creating our own wrapper of GTK 3 and port the whole editor but after a study of our users, it resulted that 96% of them used Wave Engine for Windows. After this fact, we proposed that continuing to support Linux and MacOS was very expensive for the team and we decided to concentrate all our efforts on developing a new editor in WPF for Windows with which we would get a better integration with this operating system as it was the one used by the vast majority of our users.

The new 3.0 editor is more solid, it consists of 2 independent processes, one that manages the rendering of the 3D views and the other that manages the UI and the different layouts. This allows the editor to not close or lock when an error occurs during the rendering of views, and even allows us to recover the render by restarting the rendering process, which has led to an increase in the stability of the new editor.

The new Wave Engine 3.0 editor is completely flexible, it allows the modification of the user layout for each project. All icons have been redesigned to be vectored, so we will never see pixelated icons on high-density screens again. It includes a theme manager that will allow you to switch between dark and light themes to help display on different screens. The contents of an application are even easier to create and edit, it is possible to visualize all the contents and modify them in real time. There is a new system of synchronization of external changes, which means that if we modify an asset externally, the editor will be informed and kept up to date.

New viewers have been implemented for each type of asset, which is more complete and more functional. These viewers are not external processes as in the previous version of the editor, they run inside the new editor and in the same context which greatly increases the loading speed.

New Effects Viewer: Allows you to write your own effect. An extension for HLSL has been designed that will help automatically port the created shaders to all the platforms supported by Wave Engine. This extension is metadata that easily defines and models properties, shader passes, default values…

New Materials Viewer: Shows on a 3D surface a material that we can modify while we see the changes in real time.

New Render Layer Viewer: The painting of entities is grouped by render layers, in this viewer the layers are created and modified, allowing modification of the sorting direction, the rasterizer configuration, the color mixture (BlendState) and the depth control (DepthStencilState).

New Sampler Viewer: This viewer allows you to create and edit Sampler assets, which allows you to modify the way in which Wave Engine will treat the textures to which each Sampler is applied.

New Textures Viewer: As in the other viewers, a new texture viewer has also been included where you can indicate the output format, % scaling, if the texture is NinePath type, if it is necessary to create MipMaps or if the texture includes the pre-multiplied alpha channel, as well as the Sampler that will be used to draw.

New Model Viewer: The visualization of models has improved with the development of the new viewer and the incorporation of the GLTF format. The viewer allows the models to be observed, as well as modifying the illumination to improve the detail. It is possible to access each of the animations included in the model and assign key events to specific times in each animation. These events could be used to launch methods in our code, reproduce sounds, activate effects and other activities we imagine.

New Audio Viewer: Another of the improvements of this version is the new Audio file viewer, where you can see the waveform of the file and configure the output characteristics such as the sample rate or the number of channels.

New Scene Viewer: This viewer is the center of the editor. The viewer unifies and uses all the contents so that the user can create and modify scenes, which are fundamental pieces of any application. The scene viewer controls and organizes the entities associated with the scene, as well as the components, behaviors, and drawables associated with each entity. These entities can be grouped in a hierarchical way that allows an easy and logical organization, and also includes the possibility of filtering the entities by name within the tree. The viewer allows direct modification of the preview of all the entities through the so-called manipulators (translation, rotation, scale) and like 3D design programs and CAD, all these changes are immediately reflected in the scene.

New Effect Editor

One of the weaknesses of Wave Engine 2.x was the creation of own materials. Although this was possible, it required a completely manual and very tedious process. In Wave Engine 3.0 a new effects editor has been created that allows you to write your own effects that you can then use as materials in your scenes.

This editor allows you to write your own shaders and group them into effects. These shaders will be defined in HLSL (DirectX) with the engine’s own metadata that makes the step of parameters and the integration with the system easier. When defining shaders, the editor has Syntax highlighting, Intellisense, automatic compilation, as well as highlighting errors on the code itself to make it easier for the user to create and define them.

The shaders are composed of 2 blocks:

Resource Layout: Where the list of parameters that the shader will receive is defined.

Pass collection: A list of passes that integrate perfectly with the new Render system in which you can define your own Render Pipeline, as well as the passes that must have the materials defined.

It also has a 3D viewer where the shader you are defining is compiled and executed in real time. And in a dynamic way, it allows the testing of passing different values for all the parameters that you have defined in the resources section Layout, what obtains a totally interactive edition.

The effects are composed of multiple shaders, which are possible to define from compilation directives. The new effects editor allows you to define your own compilation directives and compile and visualize the different shaders generated after the activation of some or other compilation directives.

In addition, when you create very complex effects that have thousands of shaders resulting from the definition of multiple compilation directives, an analyzer is included that compiles all possible combinations of your effect indicating as a result if all combinations have compiled successfully or otherwise, which combinations have not compiled, allowing you to navigate to them and repair the errors they contain.

Once your shader is written, it is automatically translated into each of the languages used in the different graphics technologies (OpenGL/ES, Metal, Vulkan). In order to debug this automatic process, the editor includes a viewer that allows you to check which are the translations made from your shader to each language.

Finally, the editor is able to automatically generate the effect asset, as well as add a decorator material (class c#) to the user’s solution that allows you to manage the creation of such material from code in a very comfortable way, as well as the assignment of parameters to the effect, facilitating all these tasks to the user.

XR Ready

XR (Extended Reality), is a term that encompasses applications such as Virtual Reality (VR), Mixed Reality (MR) or Augmented Reality (AR).

Wave Engine 3.0 has been designed with XR in mind.

Single Pass (Instanced) Stereo Rendering

Rendering in an XR application usually requires drawing the scene twice, once for the left eye and once for the right eye. Traditionally each image is rendered in two passes (one for each eye), so the end time is doubled.

In Wave Engine 3.0, the rendering time has been optimized using the Single Pass (Instanced) Stereo Rendering technique. This is how it is broken down:

Single Pass: The scene is rendered in a single pass, sharing a lot of processing between each eye (culling, sorting, batching…)

Instanced: Each object is rendered twice using a single DrawCall via Instancing. Additionally, each instance is drawn in its corresponding texture (left or right eye). This way, a lot of processing is shared for each element (binding material parameters, update material buffers, etc…).

Stereo Rendering: The result is a stereo image (TextureArray2D), which will be provided to the headset so that it can present each eye independently.

All effects provided by default in Wave Engine 3.0 support Single Pass Instanced Stereo Rendering. Additionally, with the new effects editor, it is easy to develop an effect that supports it.

As a result, and together with the improvements introduced in the RenderPipeline, incredible performance improvement has been achieved, which can increase the complexity of our scenes.

XRPlatform

With the feedback obtained when developing XR applications with previous WaveEngine versions, all the components and services offered to users have been reimplemented in order to simplify development as much as possible.

XRPlatform is the Base Service that manages all communication with the XR platform in question. Each platform in question will be provided through implementation of that service (MixedRealityPlatform, OpenVRPlatform, etc…). Points to bear in mind:

The old CameraRig component has been removed. In WaveEngine 3.0 you just need a Camera3D in your scene, without any additional components. The XRPlatform service will take care of making this camera render in stereo in the headset.

XRPlatform exposes different properties that allow access to different interesting areas, in case the underlying implementation supports it:

InputTracking: In charge of providing the positioning and status of each of the devices of the XR platform (controllers, base stations, hands, headset…).

GestureInput: Offers access to complex spatial gestures on those platforms that support it (HoloLens and HoloLens 2).

RenderableModels: It is possible to obtain 3D models of different devices.

SpatialMapping: Provides a dynamic mesh of the environment in which the device is (HoloLens, HoloLens 2, Magic Leap, ARKit, ARCore).

SpatialAnchorStore: Allows you to add Spatial Anchors in the space and store them to be retrieved in the next session.

New extensible Render Pipeline

In Wave Engine 3.0, the way objects in a scene (meshes, sprites, lights, etc…) are processed and represented on screen can be adapted to the needs of our application.

A render pipeline is a fundamental element in Wave Engine 3.0, which is responsible for controlling the entire rendering process of the scene (sorting, culling, passes, etc…). By default, a RenderPipeline is provided, which implements all the functions required for proper operation, called DefaultRenderPipeline.

However, now users are given the possibility to provide a customized implementation of render pipeline that fits their needs. Implementing our custom RenderPipeline gives us greater granularity and customization, allowing us to eliminate unnecessary processes or add tasks not previously contemplated.

Each scene has an associated render pipeline, which is responsible for:

Collecting all the necessary elements to render the scene:

Lights: Lights of our scene (DirectionalLight, PointLight, and SpotLight)

Cameras: The list of cameras from our scene.

RenderObjects: Any object that needs to be rendered, can be meshes, sprites, billboards, lines, etc…

Preparing the elements to render for each camera:

Culling: Render-only those objects that are visible by the camera.

Sorting: Sorting objects for optimal rendering.

Batching: Grouping of the objects to be painted to minimize the number of draw calls, and thus improve performance by reducing CPU consumption.

Rendering the elements of the scene already processed. To do this, a render pipeline offers different rendering modes, called RenderPath. A RenderPath takes care of:

Managing how the lighting will be processed. (Forward, Light-Pre-Pass, etc…)

Exposing properties and textures that can be automatically injected into the materials.

Defining a series of passes necessary to paint in the scene and executes them sequentially to obtain the final result.

Each pass affects the draw call of an object. To do this, the material of the object must offer an implementation for each pass. Otherwise, the object will not be rendered.

Now, it is also possible to implement our own fully customized RenderPath, and record it in our render pipeline, so that our effects and materials can use it in the scene.

The new life cycle of entities

Wave Engine 3.0 has redefined, simplified and standardized the way entities, components, services, and scene managers work, allowing them to be attached, enabled, disabled and detached. It also keeps the old dependency injector and it improves it.

Component life cycle diagram

The new component lifecycle is explained in the next diagram:

We control the behavior of our component implementing these methods:

OnLoaded()

Called when the component has been deserialized.

Called only once during the component lifecycle.

Used to initialized all variables and properties not dependent on external components.

OnAttached()

Invoked when the component has been added to an entity, or when the associated entity changes its parent.

All the dependencies of this component have been resolved. However, they may not be initialized (can be in the detached state).

This method can be used to establish relations with other elements of the scene.

OnActivated()

This method called when a component is activated (its IsEnabled property is set to true).

Called during startup if the component is enabled by default.

This method used to realize all the task we want to realize when the entity is activated.

OnDeactivated()

Invoked when an activated component is deactivated (IsEnabled property is set to false).

Method used to make all necessary changes for preparing the component for a deactivated state.

OnDetached()

Method invoked when the component is removed from its owner entity. Its also called when the owner entity is removed from the

Method mainly used for removing all external references.

OnDestroy()

Invoked when the component is destroyed.

Called only once. Once disposed, the component cannot be used again.

This method is used to dispose all resourced associated to this component.

Element binding

We’ve also redefined the way dependencies are injected in the component. All the dependencies are resolved before the component is attached.

Wave Engine 3.0 allows these attributes as element bindings:

BindComponent: Injects a component of the same entity of a specified type..

BindEntity: Injects an entity reference by its tag.

BindService: Injects a service of the Wave application of a specified type..

BindSceneManager: Injects a scene manager of a specified type.


New Web project Support

From the first releases of Wave Engine, we have covered most of the mainstream devices: phones, tablets, desktops, headsets, etc. However, the Web was simply not reachable. The state of the art with .NET did not allow a feasible solution to build a bridge between the browser and our C# code.

We received with a warm welcome the born of WebGL (there by 2011), based on the OpenGL ES specification, consumed through JavaScript. Since OpenGL ES has been our drawing API on Android & iOS since the very beginning, it made us thought of a good choice.

By 2015, we already tried some attempts with JSIL, which transforms IL into JavaScript, but ended up canceling such path: we were able to run matrices calcs in JavaScript with a small effort, but the glue needed for drawing was a huge one which, in the end, did not assure the performance needed.

The strong shape WebAssembly is taking lately and the efforts made by Mono to run the CLR on top of it has opened us a new window to seriously think of taking Wave Engine 3.0 apps into the Web.

On late 2018, it started to be possible running .NET Standard libraries in the browser. At the same time, Uno’s Wasm bootstrap NuGet allowed us to quickly jump into our first tests consuming WebGL.

As it was explained above, Wave Engine 3.0 relies on low-level libraries to actually render on each platform, so we needed glue to match our C# code to the WebGL JavaScript footprints. We decided as well to free this component, WebGL.NET, as a separate piece of Wave Engine. Although we started with support for WebGL 1, we quickly moved to v2 because of the architecture of Wave Engine 3.0, thought to bring the best of the latest drawing APIs.

Nowadays our performance analysis comes from running our samples under different scenarios: browsers mixed along with devices. However, we have still not stressed the runtime by enabling JIT or AOT: currently, IL is purely interpreted. At the same time, Mono keeps working on their Wasm tooling, mostly improving performance.

All this enforces we believe such route is good enough to keep investing on it, followed by the steps WebAssembly it-self is gaining with time —as being able to run such out of the browser, or enabling multithreading scenarios.

We have already started playing with initial Wave Engine 3.0 apps for Web with this technology and expect to ship such anytime soon, although there is no estimation currently.

New serialization system based on yaml

Wave Engine 3.0 has decided to have more control over how the scene entities and components are stored and edited. That’s why we’ve decided to leave behind XML DataContract serialization and fully embrace the more lightweight and customizable SharpYaml serialization. This change made us improve in some key features like:

Readability

The same scene as YAML file tends to be more readable, also using less space than the XML DataContract version.

Error control

Now we have a much deep error control of the scene. The scene is deserialized even if they are components of an unknown type. This is important during development because we can keep editing the Wave scene even when there are issues deserializing your component in the application.

Customization

The easy customization of the serialization progress allows us to customize the way some specific types are serialized. This is crucial because this way the scene detects all the asset references and injects its Id. This allows just declaring properties of the base type (Texture, Model, etc), instead of declaring variables of their path.

Members serialized by default

Now all properties are serialized except the properties marked with the WaveIgnore attribute. This way creating new components by code is much simpler because we don’t have to create all their DataContract and DataMember attributes.

The best is yet to come

This is the first step taken to improve the overall quality desired for WaveEngine 3.0. However, we want to keep customizing the serialization/deserialization process and be much more flexible.

New HoloLens 2.0 support

We have been working with Microsoft in order to support all the new features which this device brings, which means a great evolution in the interaction with respect to the first version.

In this second version we now have hand tracking support for both hands with 21 tracking points, this will allow users to interact in a more natural way with 3D elements without the need to learn certain gestures to use the apps. The new API gives individual information for each finger which can be used in the new interfaces to give a more agile way of entering data.

It also includes a new eye tracking API which will enable developers to know not only in which direction the user’s head is pointing to, but also the distance between eyes and where each eye is pointing to at all times.

The environment tracking API has also improved which will help to represent environments with a higher precision, being able to generate more realistic 3D object occlusions or even use these representations as a useful part of the app.

This new device has an important change in its architecture as the HoloLens 1 ran on x86 architecture whereas the new version runs on ARM64. Since WaveEngine 3.0 already uses the new .NetCore 3.0 runtime it is capable of translating the native instructions to this new architecture, taking advantage in this way of the device.


Today a preview of Wave Engine 3.0 is released that only has support to create projects in Windows, UWP, and HoloLens.  Over the coming weeks, we will continue generating new versions to release all the work done. Stay Tuned!


As part of Wave Engine Team, thank you.

WaveEngine 3.0 Preview 2

$
0
0

New features

We’re excited to announce the release of WaveEngine second preview. In this new preview, the whole engine uses .NET Core 3.0, so all WaveEngine libraries are .Net Standard 2.0 and new project templates are .NET Core 3.0. You can just get .NET Core by simply upgrading to Visual Studio 2019 16.3.

Furthermore, you can now run your WaveEngine projects with Vulkan, DirectX12 or OpenGL/ES graphical backends. In the new WaveEngine launcher, you can choose your favorite backend to work.


How to upgrade existing projects

You can start upgrading an existing project to WaveEngine 3.0 Preview 2 today. Here, we show some useful steps to do so.

  1. Modified WaveEngine asset descriptors

Asset descriptors have a small change between Preview 1 and Preview 2 that you must fix before launching the editor with your project. Platform enum has changed its Unsupported value for Undefined value, so you need to modify all your asset descriptors inside your Content directory. Using your favorite text editor (Notepad++, Sublime…) replace “Unsupported” string for “Undefined”.

  1. Update new Launcher

Launch the WaveEngine launcher to download the new preview 2. After that, you need to close and reopen the launcher for the changes to take effect.

Next Preview

We are working hard in the preview 3 to provide you new project templates that we hope you can use soon:

  • Linux using Vulkan backend
  • Mac using Metal backend
  • Android using Vulkan or OpenGLES backend
  • IOS using Metal backend

In addition, we are working to integrate Physically Based Material (PBR) as new WaveEngine Standard Material and new photometric lights and cameras that will improve render quality. Also, we are working on a new Forward render pipeline that improves the performance of our current Light Pre-Pass render pipeline (LPP).

From Wave Engine Team, thank you for your feedback and support.

Wave Engine’s on-line glTF viewer

$
0
0

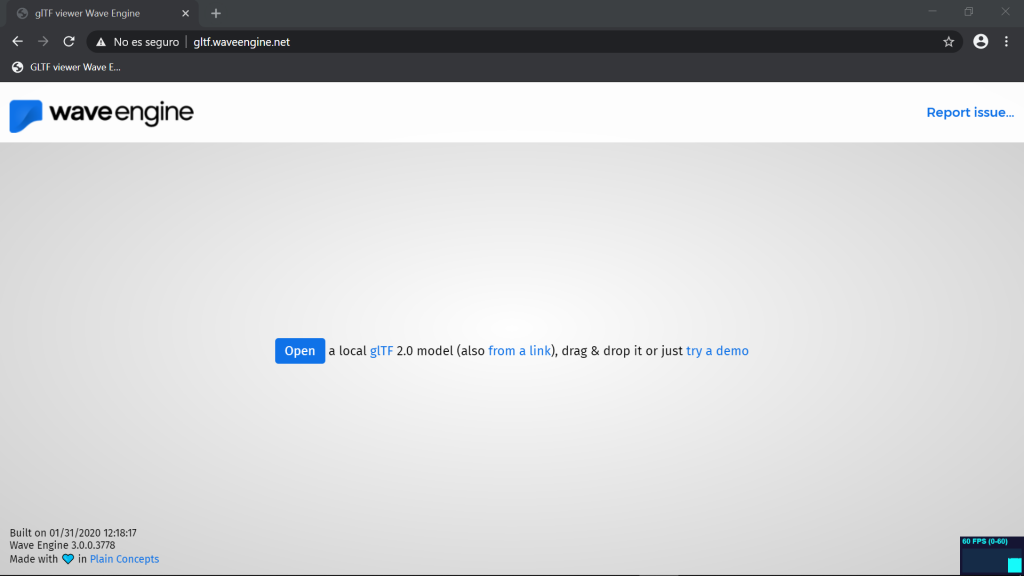
TL;DR: We are announcing our experimental glTF on-line viewer made with Wave Engine 3.0, powered by WebAssembly. Try the demo! http://gltf.waveengine.net

During dotNet 2019, on past june, we presented our initial support for WebAssembly (Wasm), showcasing our WebGL.NET library which serves us to draw at a low-level layer. On the following months we worked on refactoring the OpenGL piece into a platform-agnostic WaveEngine.OpenGL.Common one, from where WaveEngine.WebGL was born. By the end of the year our visual tests started to pass, and we were ready for testing such in a more real scenario.

Our current WebGL backend relies on its 2.0 version, which is supported by most of the browsers: the new Edge (based in Chromium), Firefox and Chrome. Although Safari allows to enable WebGL 2.0 through its Experimental Features menu, it is not 100% completed and breaks when running our app. If you are on macOS, please try Chrome or Firefox; on iOS, it is currently not possible because every browser relies on WebKit, Safari’s foundation.

The on-boarding experience

glTF viewer is a SPA (Single Page Application, a website run on a single page) which works entirely in client side, powered by Mono’s support for Wasm, which will be included in .NET 5. glTF is the nowadays standard for 3D models, and can be viewed on-line by simply drag & dropping such inside —we’ve included a demo-mode for those without a handy file close. Its main features pack:

  • support for glTF 2.0 (*) in different flavours: plain glTF, glTF-Binary (.glb) and glTF-Embedded
    • here you can find sample models
    • (*) it may happen models fail loading: we are working on making the import process stronger, and would help us if you report us any issue may find (thanks in advance!)
  • load .glb files from external links: you can show models to others by just sharing a single link (example)
  • manipulate the model with mouse or fingers, thinking on mobile devices for this last

This article will visit a few caveats we found during the development, and how we surpassed them finally. We hope you enjoy reading such and, hopefully, will learn something new in between.

There is no File System (FS) in the Web

That is not actually true. However, that is the point where we found our-selves when began to work on this project: Wave Engine relies on the concept of content, a path in the FS where the assets are placed. Such assets are, in most of the cases, preprocessed in compile-time. When an app starts the assets are ready to be consumed by the engine.

Thinking on dropping a set of glTF files within a web page, we needed to drive through the content pipeline in order to process the model through our glTF importer. Along with Kenneth Pouncey (thank you!), from Mono, we had already rewrote in C# the Emscripten’s tool to build a Virtual FS (VFS), Mono.WebAssembly.FilePackager, by specifying a local path; however, how do we write there files coming from the outside? Emscripten has solved this already, by offering a FS API in JavaScript, in a flavour similar to common I/O operations:

function writeToFS(filename, typedArray) {
    // TODO would there be any other way without handling exceptions?
    try {
        FS.stat(DropAbsoluteDirectory);
    } catch (exception) {
        FS.mkdir(DropAbsoluteDirectory);
    }

    let destinationFullPath = DropAbsoluteDirectory + '/' + filename;
    let stream = FS.open(destinationFullPath, 'w+');
    FS.write(stream, typedArray, 0, typedArray.byteLength, 0);
    FS.close(stream);
}

This functions writes the bytes at typedArray into Emscripten’s VFS

Solved this, the next issue we found was how to overcome the glTF files dropped were not processed in any way, and Wave Engine “does not support” reading such on the fly. The quotes are intended, as we do support such: dropping such in the Editor renders the model immediately, but there is some magic underneath.

We started exploring to consume WaveEngine.Assets namespace inside and app, instead of just from the Editor, which was its natural environment. And voilá, it worked! When a .glb file (the single binary format for glTF) is dropped:

  • it is imported by “decompressing” its content (textures, materials, etc.) into the FS, and
  • it is exported by generating .we* files ready to be read by Wave Engine

One of those files is the actual model, which later is used to instantiate the entire entity hierarchy added to the scene. It is not a heavy process when run on the desktop but, when used from Wasm, it takes some precious seconds. Mono has recently added support for multi-threading but, until such will not be broadly adopted by most common browsers, we still cannot rely on it, although will definitely help us reduce such time, as we currently process items one by one.

One of the most time and memory consuming tasks above process takes is texture importing, which will cover next.

Getting image pixels

Of the large bunch of models we have tested those days, the most common textures are made of 2048 x 2048 pixels. When we read such the pixel format is expressed as RGBA, which means 4 bytes per pixel. Thus, if we want to allocate space to read the image in memory we need arrays of 2048 * 2048 * 4 bytes, which is a lot. We have found in some minor cases 8K textures, which make such even worse.

Allocating memory it-self is not a problem, Wave internally depends on ArrayPool for importing textures, which at least makes that smoother. Textures are handled by our ImageSharpImporter, SixLabors’ ImageSharp, which we chose mainly because of its cross-platform feature but, under Wasm, there is a large room open for improvement. With big numbers, decoding a 2048 pixels side image can take more than 10 s, which breaks the experience with no doubt. (We have found also blockers with AOT, but eventually workarounded such by disabling the stripper on their assemblies.)

How, then, can we read images faster? For our WebGL.NET samples gallery, our friend Juan Antonio Cano consumed Skia through some initial .NET bindings, and already solved such by taking some hundred ms. However, the current state of such bindings, made by Uno team, were not compatible with vanilla Mono Wasm, thus we looked for an alternative thinking on maintenance in a future. Also important, we only needed the small piece to decode an image, and nothing else.

It turns out CanvasKit (“Skia in Wasm”, quickly), exposed such piece, and has a JavaScript interface. We made some tests in the CanvasKit playground and looked promising. Then, our CanvasKitImporter was born —replacing ImageSharp one.

private JSObject DecodeImage(Stream stream)
{
    if (!stream.CanSeek)
    {
        throw new ArgumentException("The stream cannot be seeked", nameof(stream));
    }

    stream.Seek(0, SeekOrigin.Begin);

    JSObject image;

    using (var memoryStream = new MemoryStream())
    {
        stream.CopyTo(memoryStream);

        using (var array = Uint8Array.From(memoryStream.GetBuffer()))
        {
            image = (JSObject)canvasKit.Invoke("MakeImageFromEncoded", array);
        }
    }

    return image;
}

CanvasKitImporter.DecodeImage() passes the underlying byte array to CanvasKit, which decodes the image

Loading models like FlightHelmet took from minutes (15-30) with the tab frozen to less than 20 s. And it still takes too much for us, but we must recall the asset export & import process is untouched from the desktop code. We initially though the ArrayPool.Rent(length) call was forcing Garbage Collector (GC) to pass and incurring in some seconds but, after isolating such calls, it is not the culprit at all. We still need to investigate here more in depth.

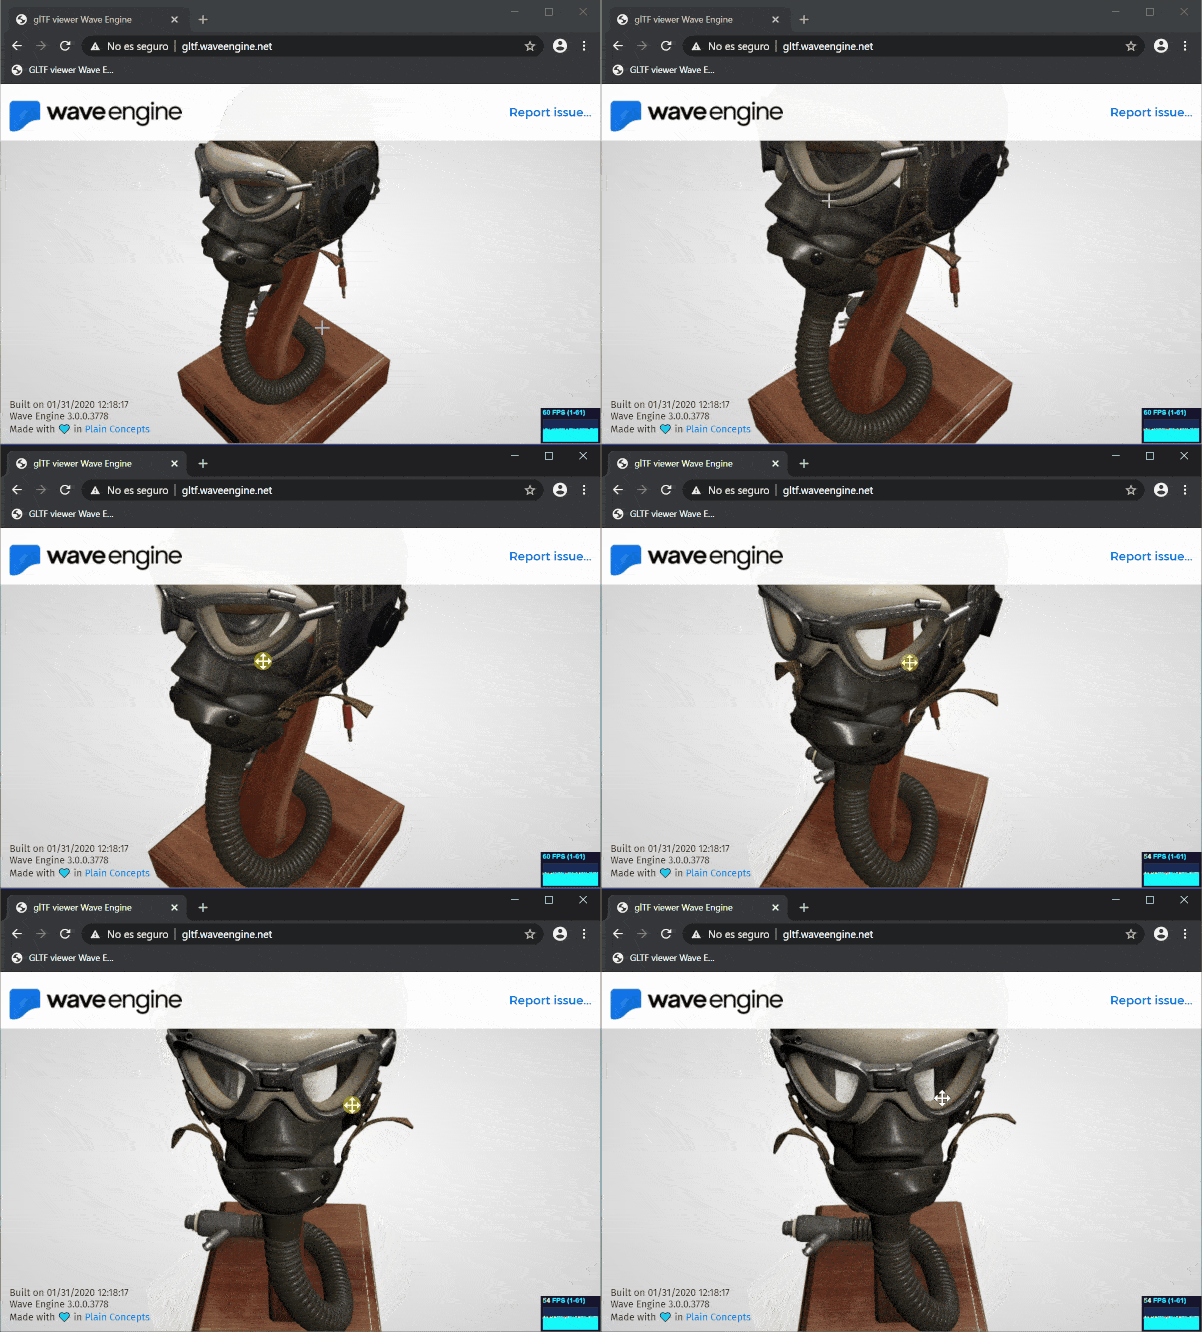
FlightHelmet model loaded (notice the ilumination)

To the Web and beyond

Not everything is solved: loading time for very big models must be reduced, memory allocation must be decreased too, our WebGL abstraction can be faster as well. Nonetheless, this glTF viewer is our first public project made with Wave Engine 3.0 for the Web.

We have pursued such during some time but the scenario was still not ready for the jump. Nowadays, we see a bunch of possibilities for helping our customers to take visual experiences into the browser, adding Web to the list of officially supported platforms.

If you think we can help you reach the Web too, we are here to listen. Oh, and if you found any issue, please report it. Thank you for reading.

Wave Engine 3.0 Preview 3

$
0
0

We are excited to announce the release of Wave Engine 3.0 third preview!

New features

In this one we have worked hard to include a new template for Web applications. The launch of Mono Wasm has allowed us to deploy your Wave Engine apps to the browser, although there are some limits at the moment (such like native libraries: Bullet Physics, Noesis GUI, etc.) You can read our post about the glTF viewer we have launched to find some details about the implementation.

Also, the engine has been updated to support HoloLens 2, integrating the new APIs and updating the Mixed Reality template.

Furthermore, we have integrated Physically Based Rendering (PBR), enabled by default in the Standard Material, and new photometric lights and cameras that will improve the render quality.

How to update

This version introduces a lot of changes in the template assets and project structure. Our recommendation is to create a new project and copy & replace its files and folders in the old one:

  • IMPORTANT: Make a backup of your project
  • Create a new Wave Engine project with the same name in a different folder
  • Copy the ‘Effects’, ‘Materials’, ‘RenderLayers’, ‘Samplers’ and ‘Textures’ folders from ‘Content’ into your original project, replacing the existing files
  • Compare each .csproj in your existing project with the new created .csproj’s, updating pending Wave Engine’s NuGets version and making other changes relative to the project structure it-self

Next Preview

We are still working hard in the Preview 4 to, hopefully soon, provide new project templates:

  • Linux, using Vulkan backend
  • macOS, using Metal backend
  • Android, using Vulkan or OpenGL ES backends
  • iOS, using Metal backend

Thank you for your feedback and support.

—The Wave Engine Team


Wave Engine runs on the Web thanks to Mono Wasm

$
0
0

What WebAssembly means for .NET

WebAssembly (Wasm) is the not-so new standard to run high performance code in the browser, in the client side. You can think of it as an optimized Virtual Machine (VM), which translates intermediate code, bytecode, into the target machine architecture, all of it within a secured sandbox. It is not a replacement for JavaScript, it is not the silver bullet, but has allowed us to think of the Web as another desktop target for .NET, in the same way Windows, macOS, Android or iOS, among other ones, already are.

You can right now run your .NET Core Console app embedded in a HTML file, make web requests, access the File System (FS), draw stuff with WebGL (the Web branch for OpenGL), and a lot of more things, just because it is the .NET runtime being executed in Wasm. There are still steps to be taken in order to make things smoother for us the Developers but, at the same time, begins to be mature enough for using along projects.

What Mono Wasm is & why Wave Engine needs it

Mono Wasm —as it was named until some weeks ago, now it is .NET too—, provides Mono’s .NET Common Language Runtime (CLR), written mostly in C, compiled into Wasm. Emscripten, an Open Source project, provides the toolchain needed to turn LLVM backends into Wasm, along with a JavaScript bootstrap to initialize the environment.

With Wave Engine, our cross-platform 3D engine focused on industrial needs, we already tried to target the Web a few years ago, back with JSIL, but the state of art was simply not ready for us. We paused such attempt until we could gain on performance and easiness to target the low-level drawing APIs.

Along with the development of Mono Wasm, and parties like Uno Platform using such as their underlying technology, we rethought our position and, after studying how WebGL could be achieved, we started enabling the Web as another platform we can, nowadays, target.

Your first app with Mono Wasm

There are currently different paths if you want to target Wasm in .NET:

  • Blazor: which “lets you build interactive web UIs using C# instead of JavaScript”, and runs on Mono Wasm underneath;
  • Uno’s Wasm bootstrap: which allows Uno Platform to run on top of Wasm, and is built also on top of Mono Wasm NuGets;
  • Mono Wasm NuGets: downloadable through their Jenkins artifacts, are the barebones needed to enable the Wasm scenario in .NET

There exist some other cool projects to turn Wasm modules into .NET assemblies —like Eric Sink’s wasm2cil—, for instance, which empower the community too.

Getting the toolchain

Every .NET Developer is used to specify their target platform/s through CSPROJ files, but this differs a little bit with Wasm nowadays. The infrastructure is still not ready, and the entire toolchain is supplied in the shape of above NuGets: Mono runtime it-self, linker, JavaScript interop SDK, etc.

In order to push in the direction which would help Microsoft/Mono to build the below mentioned infrastructure, and enjoy the latest bits from the repo, you should:

  1. Navigate to the latest successful build and download the artifacts:

    https://jenkins.mono-project.com/job/test-mono-mainline-wasm/label=ubuntu-1804-amd64/lastSuccessfulBuild/Azure/

  2. Download the ZIP containing the NuGets:

    mono-wasm-*.zip

  3. Uncompress it and find the NuGets under packages/

Creating the project

We simply tell .NET compiler to target Wasm through the Project’s SDK attribute and, apart from this, there is no other fundamental difference with any other one:

<Project Sdk="Mono.WebAssembly.Sdk/0.2.0"> 

 <PropertyGroup> 
  <TargetFramework>netstandard2.0</TargetFramework> 
 </PropertyGroup> 

 <ItemGroup> 
  <None Remove="index.html" /> 
 </ItemGroup> 

</Project> 

Basic structure of a .csproj file targeting Wasm

In order to the compiler detect where Mono.WebAssembly.Sdk NuGet is you will need to supply a NuGet.config file, establishing where such is in the hard drive.

With the goal of simplifying all these steps we have set up a repo which provides everything ready to start writing your code: WasmApp1; along with an article on how to serve the resulting HTML page locally. We though on it as if you could create a new project within Visual Studio, just choosing a Wasm template.

Interop-ing with the DOM

In the same way you update your UI controls from a Xamarin.Forms app, you make the same with the DOM in a web page: you can modify the web UI from .NET and, also, invoke .NET stuff from the UI —like through a button click, for example.

From .NET to the DOM

WasmApp1 template comes with a HTML button which fires some code in the .NET side. Such button is created dynamically when the app starts, and we subscribe to its onclick event just after:

using (var document = (JSObject)Runtime.GetGlobalObject("document"))
using (var body = (JSObject)document.GetObjectProperty("body"))
using (var button = (JSObject)document.Invoke("createElement", "button"))
{
    button.SetObjectProperty("innerHTML", "Click me!");
    […]
    body.Invoke("appendChild", button);
}

A piece of Program.cs, from WasmApp1

The Runtime static class, located at WebAssembly namespace, provides some handy methods to get a reference from a JavaScript object and, wrapped through the JSObject facade, interact with it.

You may ask why document, body and button are scoped with usings: there is actually two references for each one of them running at the same time in the browser: the one in pure JavaScript, and the one in .NET, and it is a good practice to not keep the second one alive more time than it is needed —it is indeed stored at the Emscripten layer, and can be gathered through BINDING.mono_wasm_object_registry at the browser’s Console. The less elements such contains, the better for performance.

WasmApp1 running
WasmApp1 running in Firefox

Ideally, the community will provide NuGets so JSObject may not be visible at a higher level, as Kenneth Pouncey is already doing with his wasm-dom project —see the samples folder!

From Plain Concepts we maintain the low-level WebGL bindings, WebGL.NET (really creative naming heh?), thought for Wave Engine, which can be used by just adding the NuGet package to above project. In our case, starting from Khronos’ IDL files, where WebGL 1.0 and 2.0 versions are defined, we built a Console tool which parses such files and outputs a C# backend, abstracting JSObject interop. This way we write WebGL code in a similar flavor as any JavaScript would do but feeling at home with C#. We spent a talk at past dotNet 2019 where explained more in depth how we reached everything.

There are multiple options to generate bindings for JavaScript APIs, like looking for their TypeScript mappings and working though such to obtain the C# equivalent. Or even simply doing such manually, if the origin it-self is small enough.

From the DOM to .NET

Following with WasmApp1, when an user clicks the button such happens in the DOM side, as the button triggers its onclick event. As the template showcases, such event is subscribed from .NET:

button.SetObjectProperty(
    "onclick",
    new Action(_ =>
    {
        using (var window = (JSObject)Runtime.GetGlobalObject())
        {
            window.Invoke("alert", "Hello, Wasm!");
        }
    }));

The Program.cs portion where the button’s onclick subscription happens

If we see the signature in JavaScript for a button’s onclick, a MouseEvent object is sent back, with information related. We wrap such in C# by telling our Action will receive a JSObject, thus WebAssembly.Runtime already handles the cast from JavaScript to that .NET type. In our case, we are not interested in reading its information, but could access its properties by using JSObject methods like GetObjectProperty(), for instance.

Until here, the communication has been fired from an user interaction with DOM, where a subscription in .NET is already set; however, could we simply invoke .NET code from anywhere in JavaScript? The answer is yes, and we go back to BINDINGS object, available always during the page execution, which provides a function to call static methods from a well-known assembly:

BINDING.call_static_method("[WasmApp1] WasmApp1.Program:Main", []);

Init code at index.html to execute our app’s entry point

In a syntax of type “[AssemblyName] FullQualifiedClassName:StaticMethodName” we can tell the .NET Runtime to immediately execute such method and wait for its return value. The second parameter provided is an array to pass arguments.

Wave Engine’s glTF viewer

A few weeks ago, we made public our first experiment with Wave Engine targeting the Web: a 3D models viewer:

http://gltf.waveengine.net/

glTF viewer showing the flight helmet model
Wave Engine’s glTF viewer showing a loaded model

Such supposed a milestone achievement for us, as demoed we are ready to create 3D experiences within the browser though for the industrial needs: CAD tools, 3D viewers, GPU-based computation, etc. Reaching Wasm with our C# existing codebase has meant a tremendous value for us and are sure the same applies for other companies and individuals around the globe.

If you want to look in depth how we developed this solution please keep reading here.

Looking further

Although most of the .NET Core 3 API is supported, we have stumbled upon specific scenarios which still have some caveats:

  1. You can consume System.IO namespace, but only through its sync API: it has to do with the underlying Emscripten FS virtualization, but would be great to have some documentation on what users can do nowadays, like best practices
  2. You cannot use multi-threading broadly: there is already support from Emscripten and .NET, but just some browsers support it, as Wasm it-self is maturing too at the same time

If we could write a love letter to .NET Wasm, it would be like this:

  1. A single toolchain to rule them all: currently there is no chance to get .NET Wasm bits from nuget.org (the same package names are also taken by other users), which frustrates beginners from playing with it. Uno distributes them internally; we, Wave Engine, have a private feed with such uploaded
  2. Better debugging and profiling tools: nowadays there are options to support debugging C# from Chrome’s Developer tools, but we dream with something supported from Visual Studio it-self, like debugging JavaScript within an ASP.NET Core application.

    Surely because of our nature, driven by Wave Engine, we are obsessed with gaining some CPU cycles in our apps. It would be fantastic to, as an example, open Runtime traces in Xamarin Profiler, and reuse —here I am speaking personal— my existing knowledge while using such for Xamarin apps

  3. Documentation: Blazor is doing a good job in this aspect, but is focused on the ASP.NET point of view from our perspective: we would really like plain, clean, documentation on the WebAssembly Runtime it-self, which will encourage users to think of the Web as a platform per se, from where initiatives like Wave Engine or Uno Platform emerge from ground up

Mono Wasm, or better said .NET Wasm, as the Wasm module and companion JavaScript file were renamed a few weeks ago, will be part of .NET 5. We would really like this to happen, not only because of the message it spends, but mainly for the improvements the toolchain will obtain as part of the process of making it easy for Developers to consume.

As being developed in Open Source, you, or your company, can collaborate to make Wasm support better. All the work is made at GitHub under sdks/wasm path. You can start by cloning the repo into a Linux machine —or simply under Windows 10 with WSL installed.

Going through its root README.md, enables you with everything needed to build and run the test suite used. Simply reporting bugs —where we have found the WasmApp1 repo branches to be a quick path for such— leverage the need of even more attention in this promising, and quite beautiful, platform.

Wave Engine 3.0 Preview 4

$
0
0

We are thrilled to bring you a new preview of Wave Egine.

New features

WebGL improvements.

The fourth preview comes with a lot of changes in the WebGL implementation. We have focused on improving the performance of this platform and adding  experimental support for WebGL 1.0.

The main change is the use of Emscripten for calling EGL directly from C# and allowing the use of AOT when the project is built. This means a performance boost of up to 10 times.

Visual Editor in NetCore 3.1

We’ve worked hard to port the Visual Editor to NetCore 3.1, which will allow us to move to Net 5 when the stable release is launched.

Compute Shader and Render Doc Editor integration

Also, now the Visual Editor allows you to write Compute shaders and preview its changes on output textures, and also we’ve integrated RenderDoc for capturing frames and analyzing them.

Skinning with Compute Shaders

This version made possible to add Skinning in models using Compute Shaders in the supported platforms. This proved to be 4 times faster than our previous system, due to the amazing parallel performance.

Azure Remote Rendering

Finally, we have created a new integration for Azure Remote Rendering, that is available in GitHub.

How to update

This version introduces a lot of changes in the template assets and project structure. Our recommendation is to create a new project and copy & replace its files and folders in the old one:

  • IMPORTANT: Make a backup of your project
  • Create a new Wave Engine project with the same name in a different folder
  • Copy the ‘Effects’, ‘Materials’, ‘RenderLayers’, ‘Samplers’ and ‘Textures’ folders from ‘Content’ into your original project, replacing the existing files
  • Compare each .csproj in your existing project with the newly created .csproj’s, updating Wave Engine’s NuGets version and making other changes relative to the project structure it-self

Next Preview

For the next preview we continue working on the templates for the rest of platforms. Also, we are working in the new post-processing graph editor, a new Skybox and particles system assets that will be available soon.

Thank you for your feedback and support.

—The Wave Engine Team

Introducing WaveEngine 3.1 based on .NET 5

$
0
0

We are glad to announce that, aligned with Microsoft, we have just released WaveEngine 3.1 with official support for .NET 5 and C# 9. So if you are using C# and .NET 5, you can start creating 3D apps based on .NET 5 today. Download it from the WaveEngine download page right now and start creating 3D apps based on .NET 5 today. We would like to share with you our journey migrating from .NET Core 3.1 to .NET 5, as well as some of the new features made possible with .NET 5.

From .NET Core 3.1 to .NET 5

To make this possible we started working on this one year ago, when we decide to rewrite our low-level graphics abstraction API to support the new Vulkan, DirectX12 and Metal graphics APIs. At that time, it was a project based on .NET Framework with an editor based on GTK# which had problems to support new resolutions, multiscreen or the new DPI standards. At that time, we were following all the great advances in performance that Microsoft was doing in .NET Core and the future framework called .NET 5 and we decided that we had to align our engine with this to take advantage of all the new performance features, so we started writing a new editor based on WPF and .NET Core and changed all our extensions and libraries to .NET Core. This took us one year of hard work but the results comparing our old version 2.5 and the new one 3.1 in terms of performance and memory usage are awesome, around 4-5x faster.

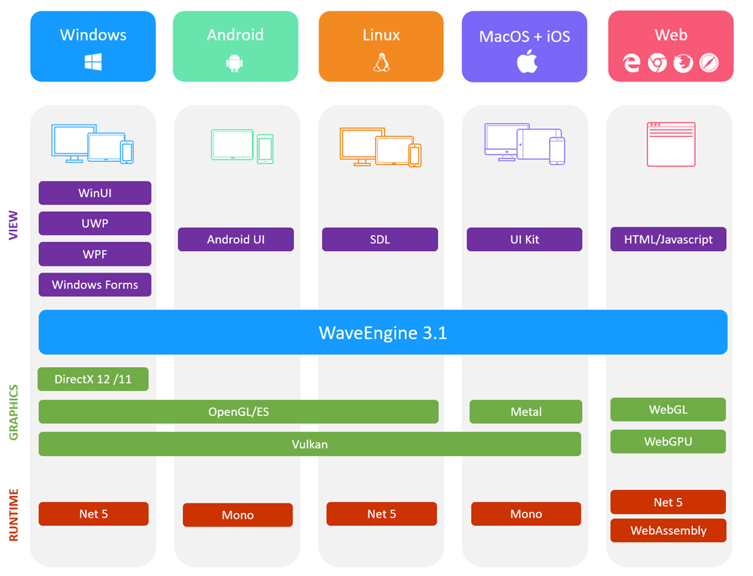
Now we have official support for .NET 5 and this technology is ready for .NET 6 so we are glad to become one of the first engines to support it. This is an overview of what we are building with WaveEngine 3.1 and .NET 5:

image of an overview of what we are building WaveEngine 3.1 with .NET 5.

We are using the .NET 5 stack on all platforms where it is possible, Windows, Linux, MacOS and Web and we use the Mono stack where it is not possible, but we are ready for .NET 6 so that we can finally unify this to use single .NET stack for all our supported platforms. One of the most interesting features that you can see in this diagram is that WaveEngine is easy to integrate with several user interface technologies like WPF, Windows Forms or SDL. If you need to integrate a 3D graphics viewer for data visualization inside new projects with .NET 5 this is a great technology to use.

WASM

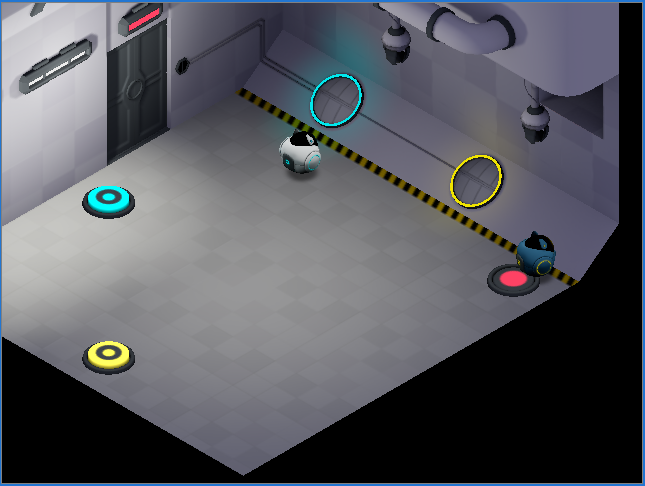
Another interesting technology in .NET 5 is a new compiler called “dotnet-wasm” with the ability to compile C# code directly to WASM to run in web browsers. Microsoft is pushing this technology as the heart of Blazor and we are able to take advantage of this to run WaveEngine on the web platform using dotnet-wasm, emscripten and WebGL/WebGPU. It is something that we have been dreaming of for years and now it is possible, here you can see it in action with project Paidia:

(The Project Paidia demo is a simple game with a new artificial intelligent model running using ONNX.js and WaveEngine on the browser)

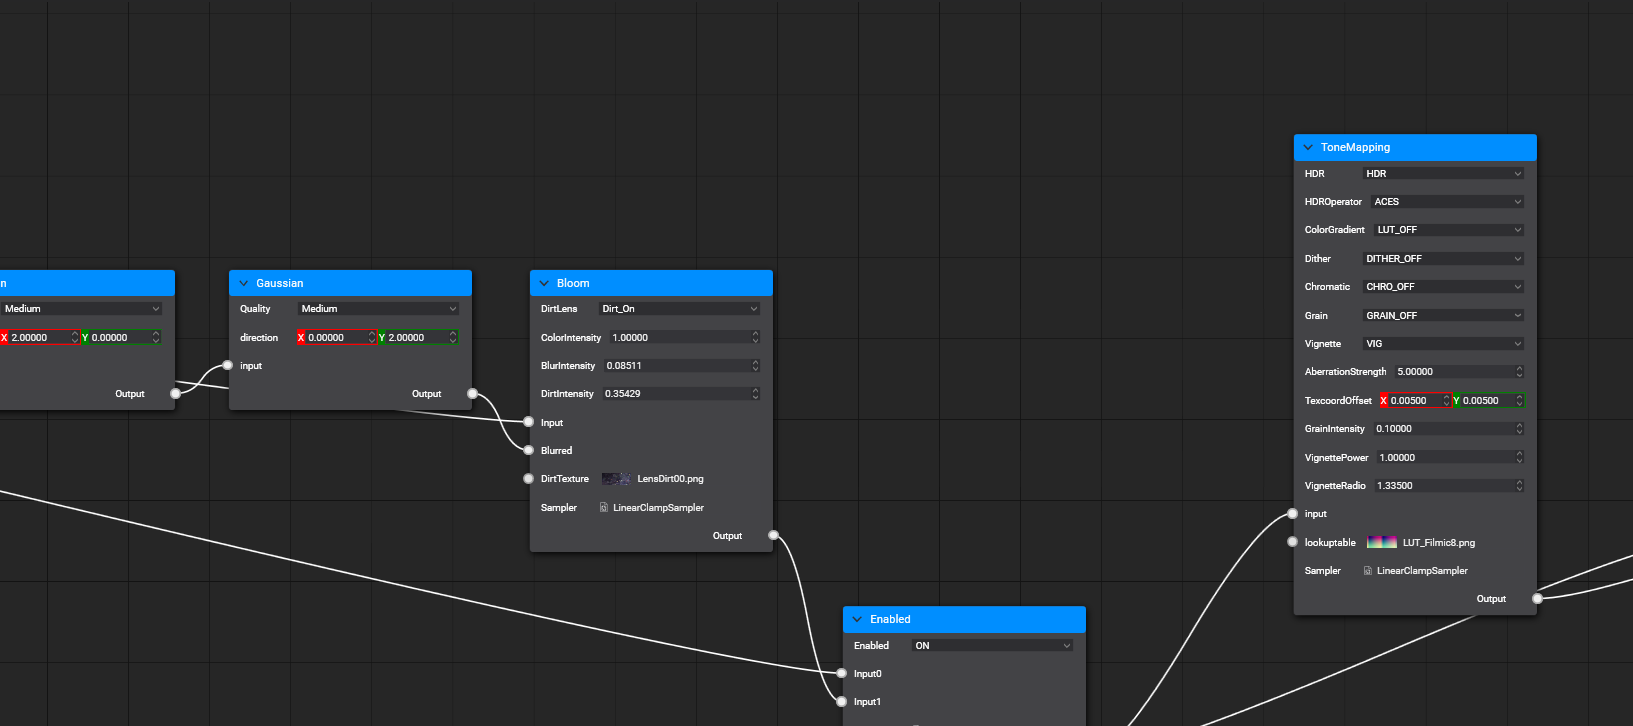
New post processing pipeline

With the new .NET 5 release we will also publish a new tool inside our standalone editor to edit the postprocessing pipeline with a graph editor. We believe this is something new in this area which will allow users to design professional postprocessing pipelines in theirs apps. It looks like this:

image of wave engine post processing pipeline

The new postprocessing pipeline is completely based on Compute Shader where it is possible to apply new techniques such as LDS (Local Data Share) to improve the standard performance based on Pixel shader. Every box in the editor graph is a compute shader with inputs and outputs, the user can write their compute shader in our effects editor or use some of the built-in ones included in the new version.

For our Standard Material the new version comes with a Standard Post-Processing graph that users can edit to adapt to their needs. The standard graph comes with all these techniques: TAA (temporal antialiasing), Bokeh DoF (Depth of Field), SSAO (Screen Space Ambient Occlusion), SSR (Screen Space Reflections), Camera Motion Blur, Bloom, Grain, Vignette, Color Gradient and FXAA.

In this video you can see all these techniques applied at the same time in a demo project:

Resources

Start developing 3D apps with .NET 5 and C# 9 right now following these next steps:

  1. Download WaveEngine 3.1
  2. Try the new samples based on .NET 5
  3. Deliver your valuable feedback to us

WaveEngine 3.2 Preview

$
0
0
We’re excited to release WaveEngine preview 3.2 today. This new release comes with a huge set of new features and improvements.
The 3.2 preview highlights include a completely new GPU-based particle system on compute shader, which offers maximum performance on the new graphics APIs, and which is backward-compatible to those platforms which don’t support compute shaders. We also introduce a new completely dynamic shadow system with support for point lights, spot lights, directional lights and all area light types. Finally, it is important to highlight the new auto scenes code generation, which improves the loading times in release mode. In this article you can find more info about the rest of changes introduced in this new version.

You can download WaveEngine 3.2 preview here and test the new set of samples from github.

Feature  Highlights

Shadows

We introduce a new completely dynamic shadows system with support for all the current light types. This system is based on shadow map techniques using texture arrays for all light types, in order to unify the filtering behavior and to reduce the standard material shader code.

Video: https://youtu.be/AAU-MLhhkFQ

There is a new ShadowMapComponent that you can add to SceneManagers which allows you to control some important parameters for all dynamic shadows of your project:


The three parameters allow you to change the size of the texture arrays used to hold the shadow maps by type of lights (area lights are considered point lights).

The shadow filter is based on an optimized version of PCF, used for all source light types, which improves visual quality when various types of shadow overlap.
The filter options are PCF 2×2, 3×3, 5×5 and 7×7. Here is a comparison of visual results using a point light:

The next parameter “AutoDepthBounds” helps to improve the visual quality for directional lights. For this type of light we use the cascade shadow map technique with 4 cascades by default. This technique is used to represent shadows in large scenes, improving the visual quality of the closest elements by spliting the camera frustum range into parts and giving more shadow map pixels to closer areas.


Due to the fact that the size of the frustum camera range is important to get better results, the distance between near and far camera planes should be as short as can be for an specific scene. To make it easier for the developer, AutoDepthBounds uses a compute shader to dynamically find the closest and farthest pixels in the last frame depth map, whose depths are used instead of the near and far plane, getting always the best visual results.

In this video you can see shadows in a complex scene comparing the effect of using the AutoDepthBounds parameter:

Particle System

WaveEngine 3.2 includes a new particle system based on compute shaders to drastically improve the performance on the new graphic APIs, as well as maintaining backward compatibility with platforms that do not support compute shaders.
It allows us to increase the particle count, interaction and effects that affect them.

alt Particle Demo

Video: https://www.youtube.com/watch?v=qtbHGJhaPqk

The key of this new functionality is the new ParticleSystem component. It allows you to specify a bunch of particle properties such as:
  • General properties: Number of particles, drag, gravity, simulation space (world or local)…
  • Material: Texture and particle render layer…
  • Other properties: Color, Life, Size, Velocity, Angle, Angular Velocity, Noise and much more.

A particle system needs another component to specify where the particle is going to be emitted. For that purpose we create additional components called particle shape emitters:
  • Primitive shapes: most commonly used shapes.
    • SphereShapeEmitter: emit particles from a sphere shape. You can specify to emit from surface, from the center or the whole volume.
    • BoxShapeEmitter: emit particles from a box shape.
    • CircleShapeEmitter: emit particles from a circle 2D shape.
    • PointShapeEmitter: emit particles from a position.
    • EdgeShapeEmitter: emit particles from a straight line.
  • EntityShapeEmitter: emit particles from the specified entity. It allows to create more complex particle systems:


Another interesting new feature is the possibility to apply forces to particles. We have included several components to help in that task:
  • PointAttractorForce: Attract (or repel using negative force) particles to a point.
  • WindForce: Apply a force to all particles in a certain range in a specified direction.
  • DragForce: The velocity of all particles under the influence of this force will be decreased.
  • EntityAttractorForce: Attract all particles to the specified entity mesh.

Scene code generation

We have worked to improve the load performance of the scenes. Using the new ‘Source Generators‘ .Net feature, the existing scenes of the project are converted to C# code, avoiding deserialization when it is loaded.

The next charts show how load time of some test scenes has been reduced drastically in Web platform when they are loaded from generated C# code:

Running these tests on Windows, the improvement is minor but still very noticeable:

At the same time, this change helps to improve the size of a built project in platforms where the linker is enabled (like web, UWP, Android..), and also removing the scene assets from the application content. For example, an empty Web project published in Release takes more than 6MB of DLLs using the 3.1 preview version and with this release it has been reduced to less than 3MB.
This first step using the new ‘Source Generator‘ feature opens a new door to improve a lot of areas of WaveEngine, like optimizing exported assets, replacing the use of reflection, getting better code-editor interaction, …

Other improvements and bug fixes in WaveEngine 3.2 preview

  • Web platform mouse enter and leave fixed.
  • MathHelper constants and calcs precision improved.
  • New templates includes a default additive layer.
  • Editor allows to change the scene viewer layout.
  • Editor color picker allows to edit hexadecimal value.
  • Primitive meshes cache.
  • Net Framework 4.6.1 support restored.
  • Non-generic overloads for container methods added.
  • Launcher auto-update checksum fixed.
  • Editor entity control undo/redo fixed.
  • Editor shows detached tabs in taskbar.
  • Editor thumbnails generation fixed for small textures.
  • Editor keyboard shortcuts working when entities tree is focused.
  • Editor entities count fixed.
  • Editor light theme fixed.
  • Editor effect selector in material viewer now does not show compute effects.

Read the original article on Plain Concepts website:
https://www.plainconcepts.com/wave-engine-new-release-3-2/

Sustanon 250 steroid: tutto cio che devi sapere

$
0
0

Sustanon 250: Una panoramica sullo steroide

Cos’e Sustanon 250?

WaveEngine 2.4.1 to 2.5.0

$
0
0

This article is a brief guide to solving the majority of problems that you will find when you upgrade your game project from WaveEngine 2.4.1 version to 2.5.0.

Although WaveEngine has an upgrade tool that runs when you open an old game project with the current WaveEditor 2.5, you can find some issues listed below.

An important point to bear in mind is that Model, ModelRenderer and MaterialsMap components are not longer supported, so you should replace them to use FileMesh, MeshRenderer and MaterialComponent respectively. For more details, you can read the following article. We allowed them to be used in the previous version as deprecated classes.

So, here we go!

Loading Game Info

The most important change is that we need to Load the GameInfo file (.wgame).

WaveEngine 2.4.1

// In the Game.cs file
public override void Initialize(IApplication application)
{
    base.Initialize(application);
    
    // The rest of the Initialize code
}

WaveEngine 2.5.0

// In the Game.cs file
public override void Initialize(IApplication application)
{
    base.Initialize(application);

    this.Load(WaveContent.GameInfo);
    
    // The rest of the Initialize code
}

RenderLayers

Main difference is LayerType properties has changed to LayerId, holding now an int identifier instead of a Type.

WaveEngine 2.4.1

material.LayerType = DefaultLayers.Opaque;

WaveEngine 2.5.0

material.LayerId = WaveContent.RenderLayers.Opaque;

WaveEngine 2.4.1

// drawable2D can be a SpriteRenderer, SpriteAtlasRenderer, TextRenderer2D, etc.
drawable2D.LayerType = DefaultLayers.Alpha;

WaveEngine 2.5.0

// drawable2D can be a SpriteRenderer, SpriteAtlasRenderer, TextRenderer2D, etc.
drawable2D.LayerId = WaveContent.RenderLayers.Alpha;

Mainly every property Type LayerType has been changed to int LayerId.

Sampler State

The AddressMode has now evolved to the SamplerState, and can be configured in the Texture Asset, instead of the material or the component.

StandardMaterial

WaveEngine 2.4.1

standardMaterial.Diffuse = diffuseTexture;

WaveEngine 2.5.0

standardMaterial.Diffuse1 = diffuseTexture;

WaveEngine 2.4.1

standardMaterial.DiffusePath = WaveContent.Assets.Textures.Texture1_png;

WaveEngine 2.5.0

standardMaterial.Diffuse1Path = WaveContent.Assets.Textures.Texture1_png

WaveEngine 2.4.1

standardMaterial.TexcoordOffset = Vector2.Zero;

WaveEngine 2.5.0

standardMaterial.TexcoordOffset1 = Vector2.Zero;

WaveEngine 2.4.1

standardMaterial.Ambient = cubemapTexture;

WaveEngine 2.5.0

standardMaterial.ENVTexture = WaveContent.Assets.Environment_cubemap;

WaveEngine 2.4.1

standardMaterial.AmbientPath = WaveContent.Assets.Environment_cubemap;

WaveEngine 2.5.0

standardMaterial.EnvironmentPath = WaveContent.Assets.Environment_cubemap;

Dual Material

The DualMaterial class has been removed. It has been merged into the StandardMaterial, which now has Diffuse1 and Diffuse2 properties, among others.

Viewing all 54 articles
Browse latest View live